
How to Use a Rotary Cutter for Quilting: A Complete Beginner's Guide
How to Use a Rotary Cutter for Quilting (Without Messing Up Your Fabric)
If you ask me what the hardest part of quilting is, I will tell you the same thing every time: the rotary cutter. Not the sewing. Not the color choices. The rotary cutter. And if you have been struggling with yours, you are in exactly the right place.
This lesson of the Brave Beginner Quilt Course is all about learning to cut fabric with precision. My studio assistant, Kelly, has used a rotary cutter before to prep fat quarter orders for shipping, but cutting quilt pieces is a whole different skill. When you are cutting pieces that need to finish at one inch in a quilt, a smidge off matters. I walk Kelly through exactly how to fix that in this lesson, and I am going to show you, too.
Choosing Your Rotary Cutter and Ruler
Not all rotary cutters feel the same, and that is actually a good thing. Some are heavier, some are lighter, and the right one for you is the one that gives you control. I recommend going to your local quilt shop and picking up a few to feel the difference before you commit.
Kelly's favorite is the purple one. She used it first, and it just feels right. That is a completely valid way to make the decision.
For the ruler, I recommend at least a 24-inch ruler if you are making Jittery Wings patterns, because it will span the full width of a fat quarter and give you overhang on both sides to help you get started. The 45-millimeter blade is standard, and the most important thing to remember about any blade is to replace it when it starts to skip or leave a single thread uncut.
How to Line Up Your Fabric Before You Cut
Precision starts before the blade ever touches the fabric. Here is how I set up every cut.
Start by using the selvage edge to help you line up along the grain. The grain is the woven threads running through the fabric, and cutting along it keeps your pieces stable. Then position your ruler so that just a small amount of fabric hangs over the edge. Check the alignment at the top, at the bottom, and at the small dot marks on your ruler. If one end has more fabric hanging off than the other, use the ruler's quarter-inch dots to slide everything into alignment before you cut.
This is the step most beginners skip. Check it every single time.
The Three-Point Pressure Technique
The biggest mistake I see new quilters make is trying to hold the ruler still by pressing down with the palm. That actually makes the ruler wobble. Instead, I teach three points of pressure: the thumb, the pointer finger, and the pinky. The pinky pressed against the mat and the ruler's edge. That pinky is doing real work. It keeps the ruler from sliding to the side while you cut. Lift your palm OFF the ruler. Spread your fingers out wide, but comfortably.
Once you are lined up and your pressure points are set, hold the rotary cutter straight up and down at a 90-degree angle to the ruler. Start below the fabric, cut up to your top finger - the pointer, then walk your hand up the ruler and reset your pressure points before continuing. I call this walking your hand, and it makes a bigger difference than most beginners expect.
It can be difficult to focus on both your hand and moving the cutter. This takes practice.
How to Change a Rotary Cutter Blade
Every rotary cutter is a little different, but the basic process is the same. Open the cutter, remove the old blade carefully (hold it by the inner portion, not the edge), and drop it into a labeled container marked for trash. Do not skip this step. A dull blade in the trash can is a real hazard.
New blades come with oil on them. Before you cut your quilt fabric, make a quick cut through a scrap piece to get the excess oil off.
And yes, Kelly and I needed a new blade right in the middle of filming this lesson. If yours is skipping or leaving that one stubborn thread across the cut, it is not your technique. It is the blade.
REMEMBER: Don’t pull on that thread, as it can pull it out through the remainder of your fabric. Use the blade to cut that stubborn thread free.
Cutting Strips With Consistency
Once you have a clean edge, you are ready to cut strips. Here is something I want every beginner to know: a mat inch and a ruler inch are not always the same. Different manufacturers use different line thicknesses, which can make a meaningful difference in your pieces, especially on small cuts.
The solution is simple. Pick one and stick with it for the entire quilt. Always use the mat measurement or the ruler measurement. Just do not mix them. That consistency is what keeps all your pieces the same size.
Practice Before You Cut Your Good Fabric
I say this plainly in the video: do not start cutting your quilt fabric if you have never used a rotary cutter before. Cut scraps. Cut strips you do not need. Let your ruler slide on you a few times in a low-stakes situation so you know how to recover.
Because the ruler will move. Your hand will forget to walk. You will get to the end and realize the cut went sideways. That is not failure, that is practice, and it happens to everyone.
When it does, just treat it like a fresh edge and start again.
Ready to Start Cutting Your Quilt?
The free Sidewalk Cracks pattern is waiting for you. Sign up at the link below to grab it and follow along with Kelly as she makes her very first quilt.
If you are not sure about your fabric choices yet, two great paths are waiting. You can work through my Color Flow Theory course to learn how to build a palette you will love, or you can skip the decision entirely and order a curated fat quarter bundle straight from the shop.
When you are ready for ongoing support and a community of quilters who will actually look at your photos and help, that is what Hive+ is for. I would love to see you in there.
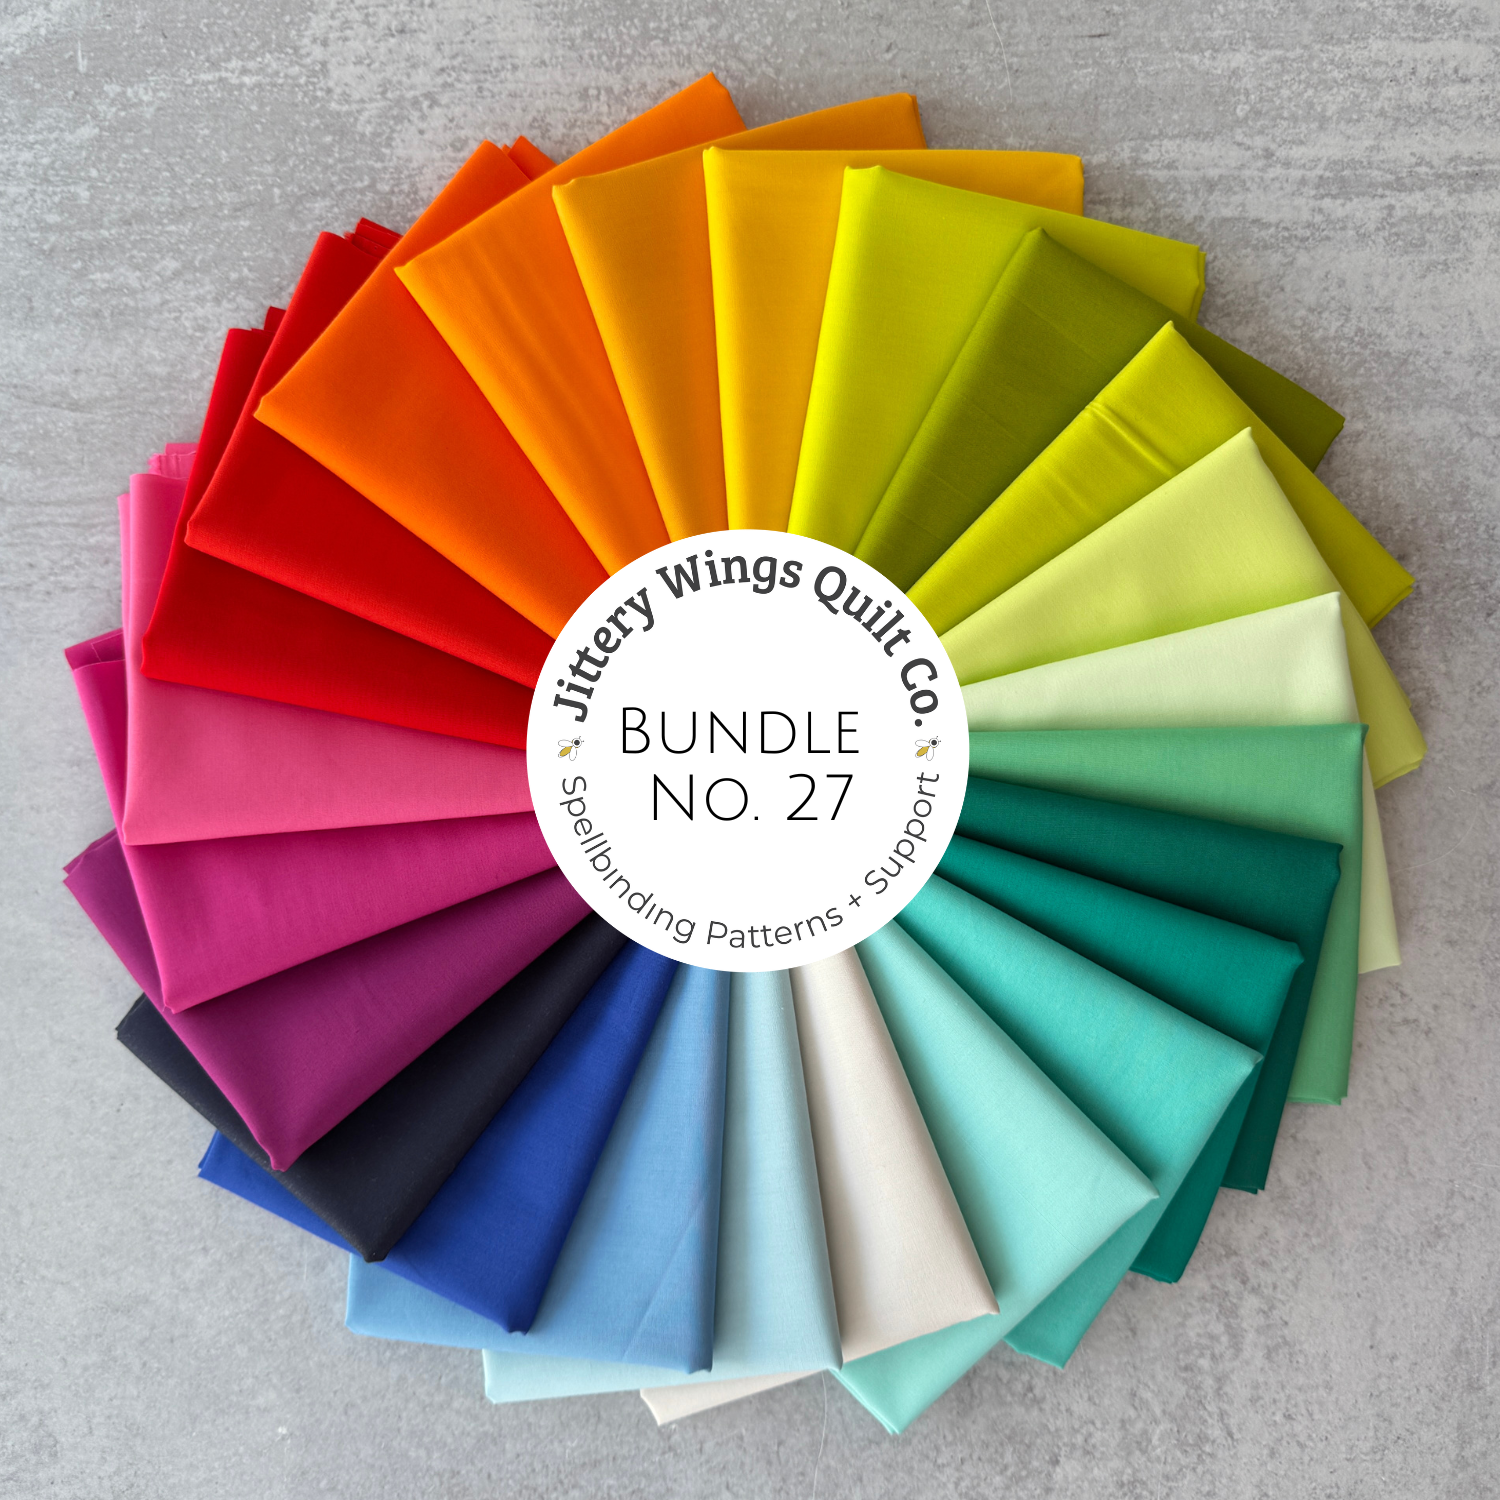
This curated Bundle by Mitzie Schafer from Jittery Wings Quilt Co. is only available here. It works for most of her controlled improv patterns, such as All the Good, Caper, Cosmic Sass, Silas Pew, Gingham Meadow, Pursuit, and Cosmic Sass. She curated them specifically for quilters who want to make those patterns.
Fat Quarter Total: 24
Fabric by: Art Gallery Fabrics
Bundle Type: Pure Solids
Availability: Until supplies last
It will ship in 1-3 business days.
Note about Fat Quarters: A fat quarter is cut by dividing a yard of fabrics into quarters. Depending on the manufacturer’s width of fabric (usually 42” to 44”), a Fat Quarter measures approximately 18” x 21”.
Note about Exact Fabrics: From time to time, depending on availability from the manufacturer, we may substitute a color or two. The feel of the palette will not change, and the fabrics will be from the same manufacturer.
We strive to keep all Art Gallery Pure Solids in stock.
These bundles are exclusive to Jittery Wings. Outside the US? We partner with Cow and Giraffe for international shipping if you are outside the US.
Here’s a list of colors if you need to order more:
PE476 - Purple Wine
PE475 - Very Berry
PE404 - Festival Fuchsia
PE537 - Undeniably Red
PE490 - Ruby
PE406 - Burnt Orange
PE520 - Sweet Tangerine
PE514 - Summer Sun
PE448 - Canary
PE578 - Electric Lime
PE554 - Parrot
PE416 - Lemonade
PE409 - Light Citron
PE528 - Celestial
PE443 - Sweet Mint
PE478 - Jade Cream
PE527 - Peacock
PE526 - Secret lagoon
PE424 - Mirage Blue
PE403 - Fresh Water
PE434 - Tranquil Waters
PE477 - Aero Blue
PE455 - Royal Cobalt
PE498 - Heart of the Ocean