
What is a “Controlled” Improv Quilt
The 3 Types of Quilts
When I started quilting, I learned about traditional quilts, modern quilts, and art quilts. I was fascinated by each type for various reasons, and honestly, I had trouble picking a favorite. I always felt like I was some combination of them all. Then I learned about something called improv quilts and well, my mind was blown!
Before we get into Improv or Improvisational Quilting, let’s look closer at the three types of quilts. Most quilt shows will categorize quilts in these categories. The three types of quilts are traditional, modern, and art. Some quilters find themselves attracted to a single type, while others will dabble in all three. Let’s look at the three types more closely here.

Traditional Quilts: There is a lot to know about a traditional quilt, but in short, a Traditional Quilt usually has one or two key blocks of the same size repeated in orderly rows. Often, a traditional quilt will have strips of fabric between the blocks. This is called sashing. It may also have a smaller pieced block at the corners where the sashing meets. These are called cornerstones. The blocks are often made up of the basic block types like Nine Patch, Four Patch, Flying Geese, Half-Square Triangle, Pullman Puzzle, etc. The fabrics for the quilt are often set inside a single background fabric that is prominent throughout the quilt. Finally, there is often a border or two around the entire quilt. Traditional quilts place an emphasis on functionality - they are most commonly made to be used.
Modern Quilts: The Modern Quilt Guild, of which I am a member, has the market on defining “modern quilt” for today’s time. However, the entire point of being “modern” is that it matches today. The older the Modern Quilt Guild finds itself, that new look will likely evolve. A Modern Quilt is one that includes design elements like high levels of contrast, graphic areas where solid colors are prominent, minimalism, bold colors, vibrant prints, critical use of negative space, minimalism, and alternate grid work. It should also be stated that this is not an exhaustive list, and as mentioned above, the Modern Quilt Movement is still evolving. Improvisational quilting is also considered a form of Modern Quilting, but I want to talk more about that below. Modern quilts are made to be functional and consider modern type design.
Art Quilts: While Traditional and Modern Quilts have a core purpose of functionality, Art Quilts place a greater emphasis on the design elements. They are often designed to be displayed or hung in homes, offices, or galleries. Art Quilts incorporate one or more design styles like collage, landscapes, abstract, portrait, pictorial, and yes improvisational. They move away from, intentionally, the traditional or historical blocks often found in Traditional Quilt Patterns. They may also include other elements or materials in them like webbing, wool, non-quilting fabrics, and paint. In addition, to using actual paint, Art Quilts will often feature “Thread Painting,” which means the artist uses thread densely in key elements of the quilt to bring the color, movement, or image to life and give it more of a 2-D effect.
As evident here, improvisational quilting appears in both Modern and Art Quilts as a key design element in identifying the type of quilt. The larger differences between the three types of quilts are related to their functionality first and design second.
What is Improv Quilting?
Improvisational Quilting, also referred to as Improv Quilting, involves making a quilt without a map or a destination. Improv quilting is about getting in the car with a full tank of gas, snacks, and a water bottle and driving until you find a place you really like. Then, you stay there, maybe for a while until you get bored, or maybe for the entire trip.
Improvisational Quilting is quilting without design rules, boundaries, or specific intentions. While the basic quilting techniques of piecing, pressing, and trimming apply, the design is free, fluid, and flexible. The design is built as you go.

I have been part of a Round Robbin, where everyone in the class has a brown paper bag full of fabric pieces. You pass your bag to the right, blindly take a piece of fabric, and then add it to your quilt. The process continues until each person in the Round Robbin has a fabric piece from each person. Some people in the class will work in strips, others in a more traditional Log Cabin block style, and others in a Wonky Log Cabin style. Everyone’s quilt looks completely different and some work and some don’t honestly.
Before I knew much about improv quilting from practice, I looked at the following two definitions for my own education. I was curious, and this is what I found.
The Quilt Show describes an improv quilt as one made “without a specific intention.” They classify it as modern. They suggest I believe rightly so, that improv quilts “just begin.” The quilter doesn’t begin with a concept, but rather the piecing develops along the way. In this respect, quilters are carried by their own ideas, inspiration, skills, and vision. The biggest thing they share is that improv quilting has “no rules or boundaries and it is as much a style as it is an attitude.”
The Modern Quilt Guild has a lot to say about improv quilting. In their blog post from November 17, 2017, they talk about Improvisational Quilting or Piecing. They define improv piecing as, “sewing together fabric without always measuring and cutting to precise measurements. The freedom of piecing like this appeals to many modern quilters…There are no mistakes to be made in improv piecing – if you like the way it looks, it works!”

My first adventure into Improv Quilting
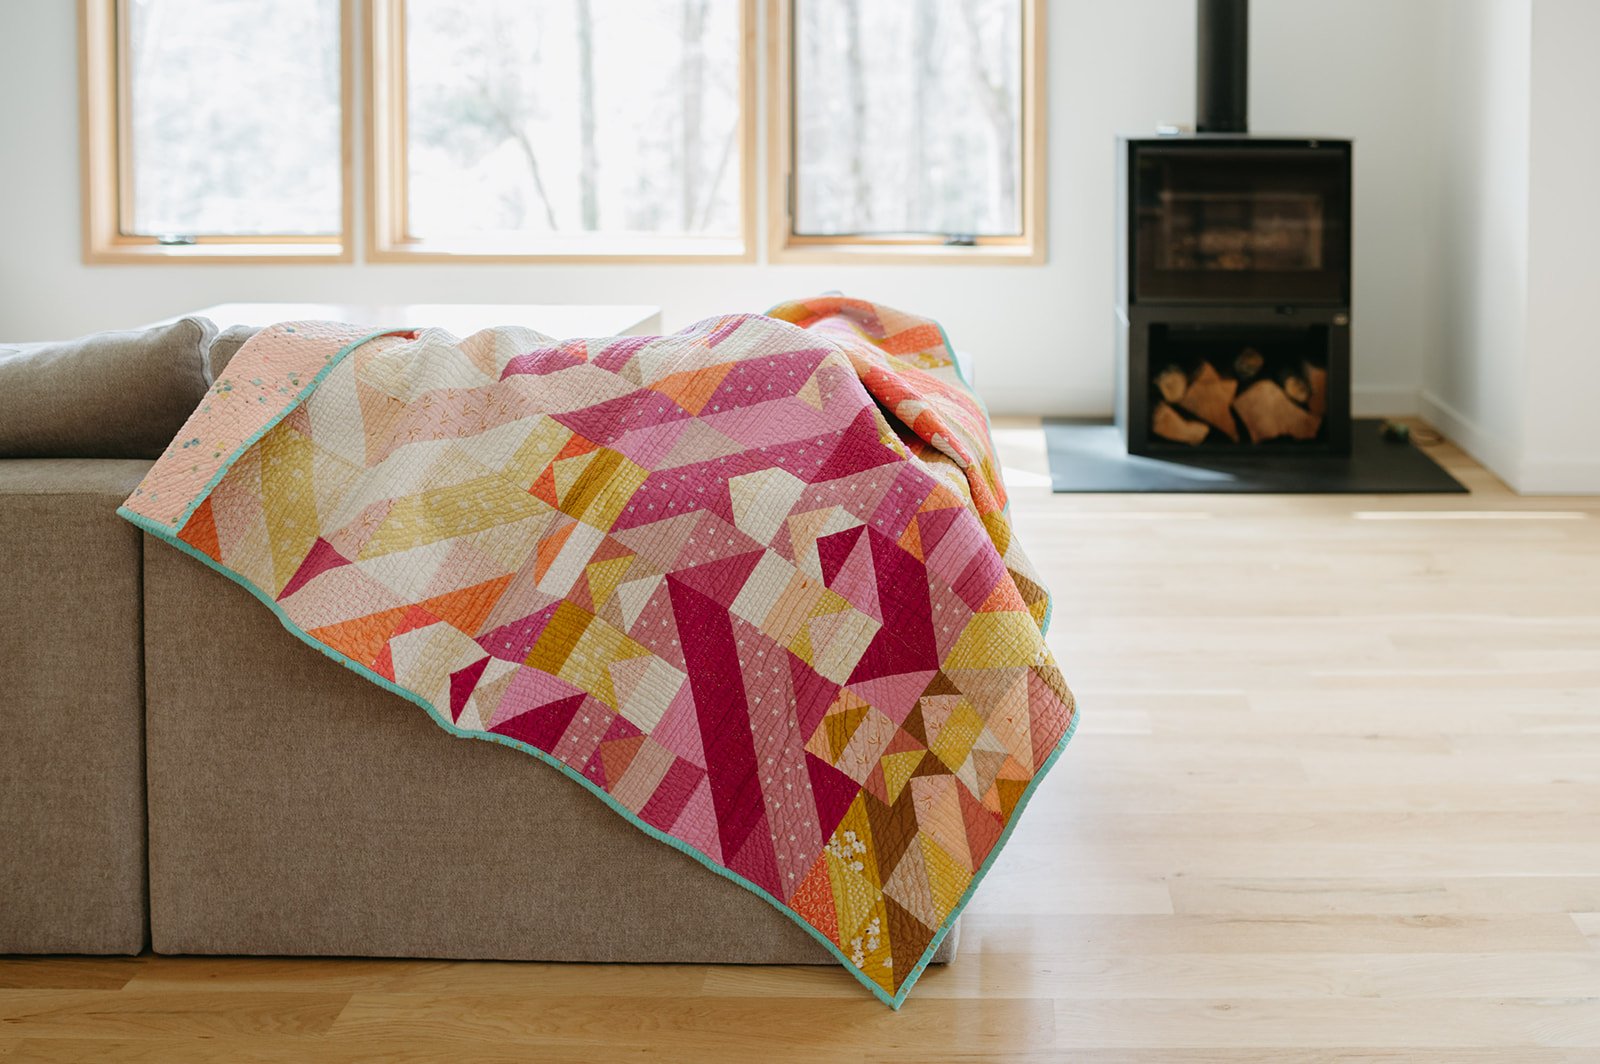
With these two definitions and some images of improv quilts on my Pinterest Board, I set out to make my first improv quilt. It doesn’t have a name, but it is pictured above.
This first quilt was a self-described success. I took large, wonky-cut strips of fabric and sewed them together. Then, I trimmed them to either 4” squares or 8” squares. After laying it out on the floor, I determined the design worked best if the strips were all turned horizontal. As a whole, the colors worked well together. I started to think about flowers in a field with green stems and leaves. Looking back, I would likely not have added the green in such a concentrated location, but I had sewn the strips all together, which limited my ability to spread them out.
I was actually quite happy with it, so I decided I would make another. That second attempt, and two additional attempts after that were self-described disasters - which means, I don’t have pictures of them. They are in the trash.

When Improv Quilting Stresses You Out
I am grateful that my first attempt was successful, but after three additional, I gave up for a long while. I love to design, but designing on the fly never seemed to work out. Because, the first quilt did work out, the idea haunted me for a long time. I felt like a bit of a failure, truth be told. Then I started to get over myself. My personality is relentless, and I didn’t want to give up. I was so attracted to the visuals.

Adding Control to Improv
I started to think about things that work naturally in nature and in design. I realized that while these quilters may be willy-nilly with their design, they either consciously or unconsciously have design elements that tie the piece together so it doesn’t feel chaotic. There is some level of control applied to each of the quilts that work.
Perhaps they make the first couple of stitches and decide they like the direction and then run with it.
Perhaps they begin with specific colors.
Perhaps they begin with a shape element.
Something there ties the piece together; otherwise, it would feel like chaos to our brains—which is how my additional attempts felt to me.

As I began to think about this conscious or unconscious structure the first design element I always start with came to me.
Color & Value (Contrast): The Rainbow to be specific - ROY G BIV. Value refers to how light or dark the color appears in the specific fabric. You may have a number of yellows, but some may be darker than others. Color and Value help define the contrast visible in the quilt.
Occurrences & Alignment: Working in odd numbers (3, 5, or 7). Mostly in elements of 3 though. Natural “S” Curves and Grids can be applied to build the alignment.
Shape: This pulls to mind things like the basics, squares, circles, and of course TRIANGLES, but also straight lines, diagonals, etc.
Order & Hierarchy: Some shapes are larger than others, or all slanted in the same direction. Shapes inside or made with other shapes. In addition, the proximity of some shapes to others plays a role in the design.
Repetitiveness Vs. Percussion: Designs may repeat in layers of any of the above, or they may be the “percussion,” meaning they add the flare or pop to the design.
I started to really “look” at improv quilts and not simply read the definition, and I realized a pattern…lots of patterns. The quilts that felt like they worked had some semblance of “order” in them, which meant, whether it was conscious or not, the artist was controlling some elements by including them or not. My new instincts were beginning to feel on point.
What is Controlled Improv
Controlled Improv is the term I use (others may as well, I am not sure) to describe following a process that allows the artist to provide some freedom inside some design boundaries. I will “officially” define it here and begin using this moving forward when I am asked:
Controlled Improv Quilting is when the artist applies three or five of the design elements of color, occurrences, shape, order, hierarchy, or repetitiveness to a quilt layout while allowing freedom of fabric placement inside those boundaries. The boundaries may be defined before or during the piecing process, but once they are defined, they remain consistent to give the design balance and structure that appeals to the eye and brain as natural.
With all this, I actually stumbled into what I now call controlled improv by accident. The first All the Good quilt wasn’t designed to be a pattern. I just wanted to make it. I had to go back and write the pattern which forced me to think about these elements.

I purchased a lovely fat quarter bundle from Cottoneer Fabrics and I didn’t want to take it apart. I wanted the entire bundle in the same quilt. I also didn’t want to waste any of the fabric. With those “boundaries” in mind, I began mapping out how to use all the bundle to get as many quilt blocks as possible. I determined I could get half-square triangles, flying geese, and small rectangles. For cutting and piecing ease, I knew that the shapes would need to be in increments of 2, 4, or 8.
First, I knew the colors all worked well together - all 24 of them.
Second, I had decided on 3 shapes, and how much of each shape would be present in the quilt because I could get that many out of a single fat quarter.
Third, I know I wanted the color to “flow” by keeping similar colors together and by allow colors to transition in a RoyGBiv order. That meant that before I made all the HSTs and Flying Geese, I had to match up colors.
Fourth, I needed to begin laying the quilt out. I tried some haphazardness, but it wasn’t working. So, I determined three boundaries. First shape: The HSTs would make a diagonal, next, the small rectangles and Flying Geese would make a 4”x8” block, and finally with alignment, that all the flying geese would be pointed in the same direction.
Fifth and finally, I decided that the rectangles and flying geese would have repetitiveness in their occurrence.
After giving myself these boundaries, the design began to flourish! It was a lovely and affirming feeling. Looking back, I realize I use the same process on the computer when predesigning. I also realized that on multiple occasions at Quilt Camp, I helped others layout their designs using the same implementation of design elements.

Try Your Own Controlled Improv Quilt
It takes some time to determine the design elements, but if you are attracted to improv and feel scared of it, or if you have tried it and felt like it failed, I invite you to not give up. Instead, try to apply the design principles listed above in your own designs. Begin by checking off each design principle to determine if it needs to be applied or how you might apply it as you go. I would love to see what you come up with!
Not feeling ready to go out on your own yet? No worries. I have a growing number of controlled improv patterns you can choose from here.

